Every shelter needs to be protected from the outdoors. No one enjoys raindrops splashing on them when they’re trying to sleep or waking up in a cold, damp space.
When we purchased our A.R.E. DCU truck cap, we didn’t have all the materials to seal or secure it to our f250, George. We placed the utility cap over the truck bed, used two clamps on the passenger side to secure it down, screwed in a bolt on the driver side, and called it a day. Because I’ve never owned a truck before, I didn’t know it would need to be weatherized; you live and learn.
If you want a tour of the finished project, watch the video below.
Once we decided to convert George into a truck camper, weatherizing and securing the truck cap came in at the top of our list.
Materials needed for this project:
- Truck bed insulation tape
- 1.5” long bolts with 3/8" threading
- 3/8” locking nuts
- Washers for bolts
First, spread out a blanket that’s bigger than your truck.
Next, have someone help you flip the truck cap upside-down and lay it down gently on the blanket.
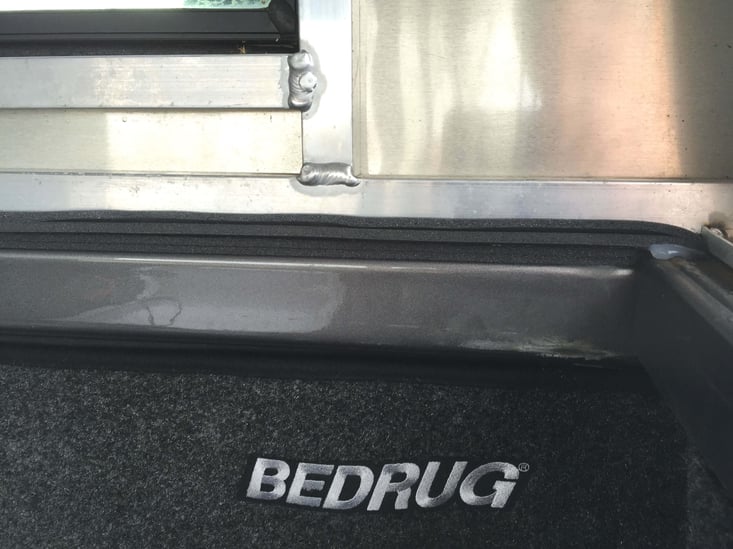
Apply adhesive truck bed insulation tape around the entire bottom of the truck cap, except for the rear hatch. If you cover the hatch area you won’t be able to open and close your tailgate easily. You may want to add a few layers of tape to the bulkhead to ensure nothing gets in or out.

Open the tailgate to your pickup truck.
Have someone help you flip the truck cap right side up and carefully place it onto the pickup truck bed. Make sure the truck cap sits even on both sides of the pick up truck bed.
Next, get yourself into the back of the truck bed and bring two aluminum hardware clamps with you. Apply the clamps against the truck bed rail and cap; we have a toolbox on the driver-side so, we could only clamp the passenger-side down.
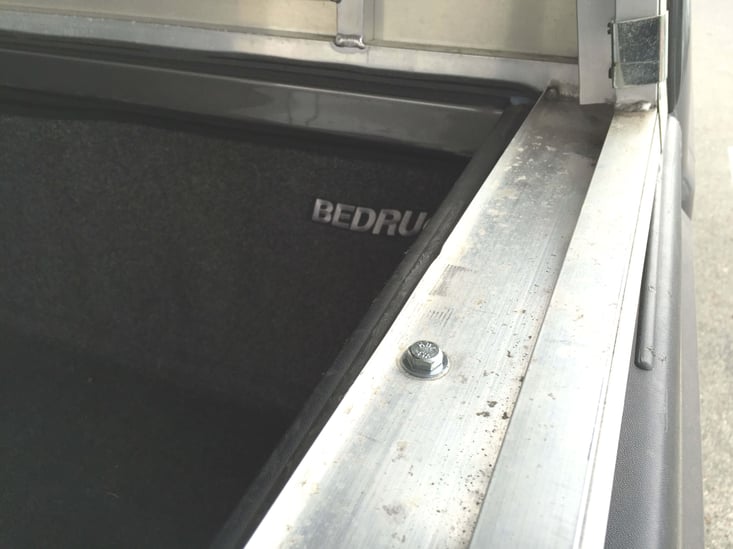
Next, drill three holes on both sides of the truck cap about 24” to 30” apart. There may already be holes in your truck cap, but don’t be afraid to drill new ones if you need to. We have a 6.5’ bed, so if yours is longer then you may want to drill a fourth hole.
Next, place a washer on each bolt and place in the hole you drilled. Once all bolts are in place, screw in the locking nuts to secure the truck cap in place.

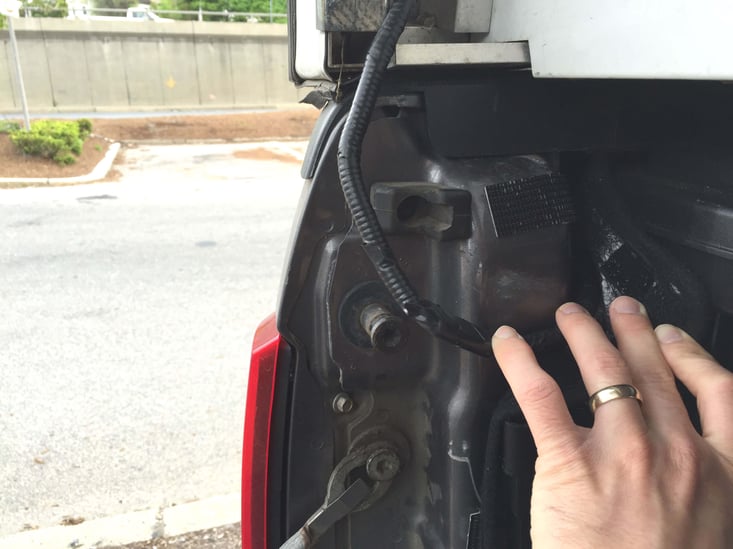
Next, determine if there’s a hole near the right rear taillight assembly for the wiring of your truck cap taillight. If there’s not, then you may need to drill a small hole.

Lastly, remove the taillight assembly from the truck cap to locate the wiring. Find the wire and make an incision, strip the casing, and butt connect the high mount brake light. Pull back a piece of insulation from the brake wire, and connect the high mount stoplight wire to the trucks brake wire.
Connecting the brake light is a tedious process, one I had help with to ensure I didn’t mess up George’s wiring. If you want further assistance on how to do this, then check out this helpful training video.
Once you finish weatherizing your truck cap, you'll be one steo closer to converting your truck into a place to camp.
If you want to learn more on how this project can help convert your truck into a liveable space, then click the link below.
Topics: Diy Truck Camper
/Logos/WWW-og-black.png?width=1019&height=851&name=WWW-og-black.png)


Speak Your Mind